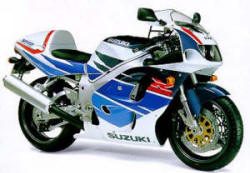
GSX-R750 96-97
All models except California

Factory Pro had it's own AMA 750 Supersport race team back then.

On our good days, we had trap speeds equal to Yoshimura - so - the tuning parts that we used (the CRB-1.7-RK Racekit) were quite competitive.

You might not be able to buy anybody else's "secret" race parts, but... you can buy ours!


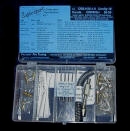
CRB-S37-1.7-RK    $179.95

1. Choose your shipping method

2.


 For the absolute BEST power, part throttle, top-end and cruise.

BEST.

The benchmark for virtually everybody who won AMA races in 96.

Excellent low speed manners and better midrange than any other carb kit.

Owner's Choice.


Hello, I have installed a Factory Pro Jet Kit.  I had previously had a Dyno Jet Jet kit in.  The Factory Pro Kit  IS WAYYYY BETTER.   
 
Any other info to help me out would be greatly appreciated.  The D*****t kit just seems like c**p now that I have the Factory Kit in!!  Thanks.
 
96 GSXR 750 T
Stock Exhaust with Yoshimura RS3 Slip on/ BMC air filter
130 Main jets outside
127.5 Main jets inside
2.5 turns out
 
Acceleration is awesome and smooth.
 Vancouver, BC weather  Around 65-75 degree weather.
 Thanking you in advance.
 
Chris Jung

CRB-S37-1.0    $139.95

1. Choose your shipping method

2.


Adds more low-end / midrange, if the proper main jet is selected, more top-end power. Easy to install and tune - no slide drilling!


CRB-S37-1.1-TI  $159.95

1. Choose your shipping method

2.


Titanium needles and Stainless steel allen screws for the float bowls. Adds more low-end / midrange, if the proper main jet is selected, more top-end power. Easy to install and tune - no slide drilling!


RTR-SUZ-37-02    $89.95

out of stock

1. Choose your shipping method

2.


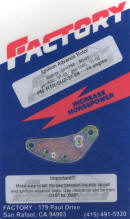
Factory Pro Ignition Advance Plate

Pretty easy to install -

Adding this +2 plate will generally perk up the mighty 750 to the tune of 1-3 more True HP when measured under full load (that's the proper way to measure real world power)
Part throttle power (power out of a corner) is also better.

This advance kit advances the ignition timing 2 degrees

This simple, bolt-on advance kit advances the timing 2 degrees. With stock engines with stock compression ratios, there is more power everywhere. Part throttle power is better - helping corner exit speeds. Improved in-town driveability and quicker warm up.
Installation instructions w/ large pics - click here


This is the same unit that was used in the #3 finishing Factory ProGSXR750 at Road America.


SHFT-PRO-SUZ-37
 
$139.95

1. Choose your shipping method

2.

Factory Pro Detent Arm Kit - Shift quicker and Stop missing shifts.

Make shifting MUCH quicker and virtually eliminate those missed shifts. This is the same kit that most of the AMA has used at one time or another -

Includes Factory Pro Microbearing Detent Arm, the Factory Pro stronger detent spring and, if the package is *carefully* opened, a new clutch cover gasket.

So.......Stop missing shifts and protect your transmission from the damage caused by missed shifts - Install a Factory Pro Detent Arm Kit soon -

Factory R/D was done @ 70 to 80 degree temp, 93 octane Howell EEE fuel, 112.75 intake LC,103.5 exhaust LC, stock ignition timing, all sensors attached, stock exhaust, race slip-on and a comp. exhaust. With comp. exhaust, main jet selection was between 130/132.5 and 132.5/135 preferred, needle clip /2 to /3 position.

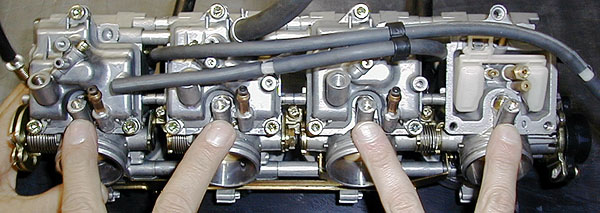
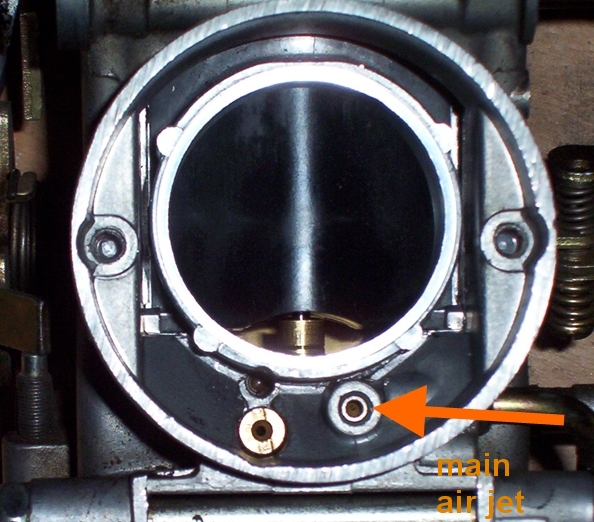
Looking for your idle mixture screws?  Here is where they are located:


Notes:
  • When using CRB-S37-1.7-RK RaceKit:
  • 40-65 degree weather - main jet selections of 132.5/135 and 135/137.5 stagger were common. Needle clip position 2 to 2.5. Indication of too high of clip position was slightly soft acceleration after 2 to 3 laps.
  • 80 to 90 weather - main jet selections of 127.5/130 or 130/132.5 stagger is estimated.
  • Exhaust systems present (D and D, Hindle, Micron, Yosh Ti and SS) required roughly the same jetting with aprox. 20 different bikes as sample base.
  • Our local test bike trapped 160,160,162,160 on Thursday.
  • Suspension:

    Mechanical Notes:

    Setup:

    cylinder head setup BEST intake LC BEST exhaust LC
    stock, as delivered valve job 107-108 101
    full radius valve job 105.5-106.5 101
    full radius valve job and valve seat rework 103-104 101
    FRVJ, porting, carbs 100-102
    (just a guess, depends on porting and carbs. Generally, the better the dynamic flow properties, the earlier you should close the intake valve.)
    Generally, the better the exhaust flow and the better the exhaust system is matched to the engine, the later/more retarded you can open the exhaust valve.

    WATCH VALVE TO PISTON CLEARANCE when advancing intake and retarding exhaust cams!!! They get closer!!!!!


    Jonathan Umfleet
    The worlds fastest Indian
    Newberg, Oregon  United States


    pn: RTR-SUZ-37-XX  -  ignition mount plate install and tech

    application: gsxr600/gsxr750/gsxr1000, 1997 to 2004

    tools required:
    5mm allen wrench
    #2 philips screwdriver
    medium flatbladed screwdriver
    Razor blade or Exacto knife
    gasket sealant
    14mm socket
    air wrench


    A look in.

    Location of ignition trigger mounting plate on:

    gsxr600, 97-01 (and similar)
    gsxr750, 96-01 (and similar)
    gsxr1000, 01(and similar)

    1. Remove the outer "palm sized" small starter cover   (already removed).

    2. Remove the inner, larger starter clutch cover (already removed). Remember, there is a screw in the upper left of the inner cover that is not accessible until the small, outer cover is removed. You will probably reuse the gasket

    3. Remove the starter clutch bolt with a 14mm air wrench (that's the easiest and quickest way).

    4. Remove the original ignition plate from the engine cases with a #2 Phillips screwdriver. (it's under the starter clutch gear)


    5. With a flatbladed screwdriver, remove the ignition trigger coil from the original mounting plate and reinstall it onto the new Factory Pro ignition plate.
    Be careful NOT to stab yourself with the screwdriver!

    Note: The gold center core plate (at B, down arrow) of the coil assembly MUST extent "proud" of the surrounding off-white epoxy area when installed and tightened. There is a small amount of play to adjust with, and it must project outwards, towards the ignition rotor, usually ~.005" to .010".  (In other words, a real little bit)
    If the center core is below the off-white surrounding area, the voltage produced will detrimentally affect the ignition system and make the engine difficult or impossible to start.

    6. After installing the trigger coil to the ignition plate, temporarily reinstall the starter clutch and bolt and rotate the engine so that rotor projection at B, up arrow is aligned with the trigger coil (so you can measure the trigger coil clearance).

    7. Install A-1phillips screw, snug. Install  A-2 Phillips screw and snug down.

    8. Measure the clearance at B. It should be .015" to .020". Adjust by loosening A-1 and A-2 and pushing the plate towards the rotor. Tighten screws when done.
    Notes:
    1. 
     .040" pickup coil to ignition rotor clearance will make the engine difficult or impossible to start.

    2.  So - you cracked the magnet because you didn't line up the locating hole......
         It's OK - just put the 2 pieces together and retighten the 2 flat bladed screws. Lucky you!


    dynoroom,onramp,toright.jpg (198084 bytes)


    Question: If .040" clearance will make the engine difficult to start, and .020 starts well, is .010" better? Haven't had time to test that, yet...

    9. Check the tightness of the coil plate screws, reinstall the ignition plate. Use a bit of light strength thread locking compound on the screws if you want, for a good job.

    10. Reinstall the starter clutch and mounting bolt. BE SURE to line up the indexing marks on the crankshaft end and the starter clutch or the TDC marks will be wrong and that could cause big problems if using the TDC marks to adjust the valves later.....

    11. Reinstall the covers (don't forget the screw under the small cover). Replace or reseal gaskets as necessary.

    12. You should not have any parts left over, except for the old ignition plate.

        True Rear Wheel HP  measurement on the EC997!


    Absolutely NO carb parts sold in California.

    New and improved Suzuki Teka SFI  2

    with new TPS display and "MMT" Memory Module Tuner

    Finally - Quick, easy, cost effective Suzuki tuning with no expensive "add-on boxes"
    Suzuki cruisers and sportbikes

    Please click here for more info

    Contact Factory Pro
    M-F, 9am - 5pm, Pacific time, -7 or -8 GMT

    800 869-0497
     USA and Canada

    415 883-5620

    parts information
     info@factorypro.com

    EC997 dynamometer information
    info@factorypro.com

    Product Support /Tech SECTION
    click here


    Mailing / Shipping address:

    Factory Pro
    101c Roblar Drive
    Novato, CA
    USA

    And most importantly
    Restart back at the HOME page and click on the red box in the top left to find the bike that you want parts for...
    restart at HOME page


    This Tuning Site has been visited by
      
    people.
    www.digits.net - the oldest counting service on the web


    LINKS
    EFI and Carb Tuning - Most all FI and carb tuning

    by Wheelsmith Racing

    Flight Training - train with AMA race winner Todd Harrington.

    The Harringtons own American Flyers, one of the most established flight training facilities in the USA.

     8 locations

     800-362-0808
    The Rich Oliver Mystery School will help you discover your hidden inner strength. 
    It will challenge you. It will teach you a new way of thinking, and a new way of riding. You can take your riding to an exciting new level!  

    We use a variety of proven drills and training techniques. 
    Practicing these techniques with our Yamaha dirt track trainers will enhance your abilities both on the track or the street.  

    It doesn't matter what you ride or race, the Rich Oliver Mystery School improves everyone's skill level and mindset!

    WW2 vintage flying Special

    Book a sightseeing flight over the Wine Country or a Kamikaze aerobatic flight or a biplane flight over famous Sonoma Raceway, the Golden Gate Bridge and the San Francisco Bay for one or two during the spring and get a free souvenir t shirt!
    (NEW!  Ask about the P-40 flights!)

    707 938 2444

    Just tell them that you saw this on the Factory Pro website!
    Marc
    Northern California's most unforgettable flying experience.  No experience required.  Open weekends!

    The extension of the laboratory for engines of the Swiss Federal Institute of Technology was completed in about 1935. Its architect was Rudolf Otto Salvisberg (1882-1940). He had a successful career in Berlin but returned to Switzerland after the advent of the Nazis. His architectural style was somewhat similar to that of Erich Mendelsohn. The staircase of the laboratory is in normal use but well preserved.
    Edited to the tunes of Chemical Residue by Herbie Hancock.