 |
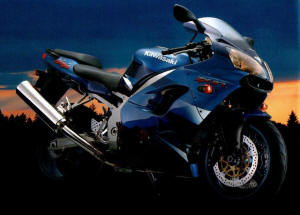
Kawasaki ZX9r, E1 and E2 00-01 |
|
|
Kawasaki ZX9r, E1 and E2 00-01 |
 |
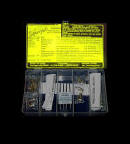
Factory Pro's
Carburetor Recalibration Kit The World's Best Kaw jet kit |
|
Factory
Pro's
|
|
|
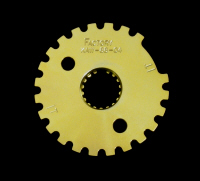
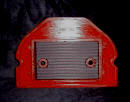
Factory Pro's
Ignition Advance Rotor improves lowend and midrange and a bit more top end |
||
 |
BMC Air Filter |
|
Factory Pro's
Billet Engine Covers |
|
|
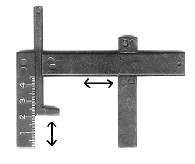
Carb Float Height Setting Tool The best way to set floats |
|
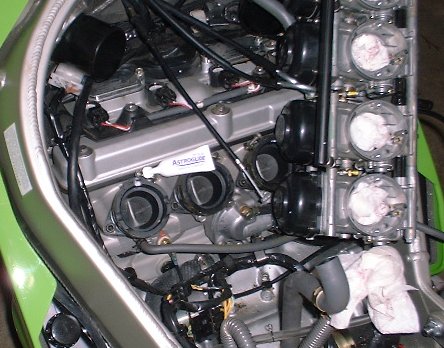
Carburetor Tuning Kit - There is only carb kit that works. |
||
|
CRB-K88-1.7-RK $289.95
2. The ONLY kit in the
world that makes added top-end power. |
|
|
|
|
Ignition Advance Rotor 2 adds more TOPEND and a bit lowend and midrange. Adds some power at all part throttle positions. Esp at high rpm. |
|
|
Sorry- discontinued |
Ignition Advance Rotor 6 adds more LOWEND and MID. |
|
|
$89.95 |
Factory Pro and
BMC
have produced the finest cleanable air filters available. Manufactured
in Europe to craftsman's standards, if any filter would last 1,000,000
miles - these would! The same filter as the 98-99 ZX-9R. |
|
|
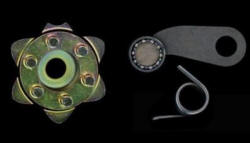
SHFT-EVO-K67-KT $239.95inc. star, arm and shift spring |
Factory Pro's
|
|
|
COV-K67-RH-KT $69.95 |
Billet Engine
Cover Right side only For race or street use. Absolutely the strongest cover you can buy. Highest strength / weight ratio available! More clearance and cover thickness than stock on both RH and LH side covers. Visible on both sides. Can be show polished to a mirror finish! Includes: gaskets, if required, and replacement stainless steel allen screws, as required. The same covers as the 98-99 ZX-9R. |
|
|
|
The only way to accurately measure float heights. Works on nearly every carburetor. Factory Pro |
|
|
Feedback "Only one thing to say - - Serious velocity - RIGHT NOW!!" "Thanks Factory!" Kurt Forget ZX-9R, 2000 |
|
Feedback |
| Subject:
Bigtime Praise Date: Fri, 23 Mar 2001 14:27:13 -0800 (PST) From: bob lenart <oneplusgman@yahoo.com> To: info@factorypro.com Marc I'm writing this e-mail to let you know how pleased I am with the CRB-K88-1.7-RK race jet kit for my 2000 ZX-9R. I have been synchronizing my carbs at least every other week trying to get rid of the cruise surge. After talking with you on the phone, the kit sounded like the answer. I am a mountain rider and can care less about 10K+ RPM figures, all my kneedragging is done around 6K, right where the ZX-9R is known to have a throttle glitch, my engine is stock, my pipe is stock and so is my intake and air cleaner. I like the way it sounds, (QUIET) So for all the ZX-9R owners who don't want to change out the aforementioned parts, this kit is the answer. Here are my final settings; Best of luck to you. |
|
Feedback |
| Subject:
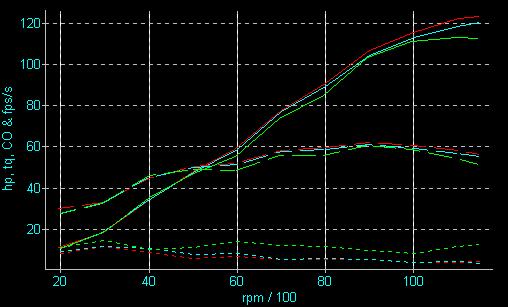
Prototype notes on 00' ZX-9R Date: 25 May 2000 23:13:29 -0700 From: eric@ericdornracing.com To: bigdaddymark@factorypro.com Hey Marc, Here is my findings on the pre-production kit, #CRB-K88-1.7-RK. Feel free to post for others to use. First off the bike was a 00' California model. Second, this kit WORKED! We used our (dxxxxxt) dyno for before and after dyno runs. All Stock as delivered from Jim Gilbert of Ashland, Oregon with 1,390 miles. Peak hp was 131.6 dynojet hp The bike is fairly "flat" from @8,500~11,500. Resembles a table almost. Customer complained about terrible "lean surge" at cruising and low speeds when he brought it in. We then proceeded to remove the stock exhaust and install a new Akrapovic full system. Complete stainless steel with a carbon fiber canister (20") installed. Emissions: First off we removed ALL emission related items; hoses, vent lines, canisters, etc. After that we moved on to removing the carbs, fairly simple, just be sure to take time in removing throttle cables. (place clean rag over manifolds!) The next step was to "by pass" the "exhaust air injection system" This is very straight forward. Simply remove the main hose that comes from the airbox on the right side and goes to the middle of the valve cover (@7" long and 1" dia.) remove the actual "valve" that connects the previously mentioned hose to two smaller hoses that connect to the valve cover. Next plug off the vacuum line that is connected to the "valve" and the #3 intake manifold. (we simply remove it and place a vacuum cap over the #3 intake manifold nipple. finally we install a @4" piece of 1/2" pipe between the two hoses that are still connected to the valve cover (and used to have the other ends into the "valve") that way the entire system is bypassed. Failure to do this WILL cause backfire upon deceleration!! (note: This is a CA bike, but is located in Oregon. It is illegal to tamper with emissions equipment in CA vehicle registered in CA. Marc) Now onto the carbs. First off we removed the float bowls on each carb. Then we replaced each pilot jet (stock #38) with the provided #40. We then moved onto the emulsion tubes and the main jet (the bigger round one, in center of carb!) We simply removed the stock emulsion tube with the main jets still installed in them from the carbs. You must then "separate" the stock emulsion tube from it's OEM "holder", this is very easy just take two 8mm box wrenches. Then install the #emu-188k factory emulsion tubes into the OEM "holder" and reinstall into carb body. BE SURE NOT TO OVER TIGHTEN the tube. Next we installed the main jets into our new emulsion tubes. The stock mains were 165 on the outside and 170 inside. We installed 175in and 178out for a starting point. We then checked the float height. Simply "rotate" the carbs until the floats "hang" free and move freely. Then "roll" the carbs back the other way until the "settle" . DO NOT COMPRESS THE FLOAT VALVE PLUNGER!!! We found this to be right! t at 4mm as delivered and left this at it current setting. We finally replaced the bowls with the new (and much better) allen screws provided in the kit. Next, you must remove the Fuel Mixture Screw plugs. Simply place the carbs so that you are looking straight down on the bottom of carbs and look for round brass cap (@10mm dia.) and remove with a appropriately sized drill bit. BE CAREFUL!! DO NOT drill too far! You WILL hit the screw head and mess it up. Take your time. Be sure to clean the carbs off very well after this. We then turned in each fuel mixture screw until it seats (NOT TOO HARD!) The stock settings were all over the place from +0x to +2.5x. We set #1 and #4 at +1.25turns out and #2,#3 at +1.5 turns out. This later gave us a CO% reading of 3.5% at idle when bike was fully warmed up. Next, we moved onto the needles. Once the carb tops were removed the needle retention cap needs to be removed. This is very simple, just "squeeze" the cap at the arrows and lift up. We removed the stock non-adjustable needles and installed the #0969j-83o-40v5_2.9bt needles included. The needle clips were placed at the /2 position (from the top) with the stock metal "shim" RETAINED! Then reverse the order to reinstall the needle, slides and caps. NOTE: if the rubber slide diaphragm does not want to "stay" in it's groove, try some grease (like Silkolene PRO RG, Dielectric grease or such) in the groove and that should hold it in place while you install the slide top. Finally we removed the airbox adapter plate on the back side of the carbs in order to modify the main air jets. When looking into the back of the carbs you will notice two "jets" you want to drill the MIDDLE ONE!!! Do NOT touch the other. We used a "PIN VISE" to drill out the main air jets. (A pin vise is a small hand held "drill" that you can purchase from a hobby shop for about $9.) TAKE YOUR TIME!! The drill bits are FRAGILE. We enlarged the #1 and #4 M.A.J. to 1.1mm with the BLACK coated drill bit. Then we enlarged the #2 & #3 MAJ's to 1.2mm with the SILVER coated drill bit. We then, after making VERY sure the entire carbs were clean, reinstalled then in reverse order of disassembly. Once installed we warmed the bike up to operating temp and shut off. We then installed a set of mercury carbs sticks and refired the bike to "synch" the carbs. NOTE: Please do NOT skip this part, carb synch is VERY important for smooth running! And do not synch until bike is up to operating temp. After a few moments to warm up we ran a few baseline runs and then "pulled the trigger" YEEE HAAA! What do you know.... 144.7hp! A HUGE 13+hp gain. Not too bad. More importantly the bike's dyno graph was actually SMOOTHER than before by A LOT. The bike now peaked at @10,200 and held most of it with in 4% of peak hp at redline! VERY NICE. Lastly the moment of truth. A call from Jim on Sunday. He said that he has NEVER in 13years of riding had a bike run so smoothly and cleanly. The bike warms right up, runs perfectly and has no glitches at any rpm or throttle position! Thanks again for letting me help your forever ongoing development of the BEST carburetion recalibration kits available. We at EDR PERFORMANCE will continue to run nothing but FACTORY TUNING products in all our race and street bike. Thanks again, Eric Dorn, owner EDR PERFORMANCE 5968 S.E. Alexander Street Unit F Hillsboro, OR 97123 503-259-2891 BTW Last weekend, May 21st Team EDR PERFORMANCE engines and Factory Pro Tuning products won the following races 600 Supersport (also 2nd, 5th, 8th) 600 Superbike (also 5th, 9th) 750 Supersport (undefeated so far at ALL OMRRA and WMRRA race weekends in 2000) 750 Superbike (also 2nd, 5th, 9th and still undefeated in this class as well) Open GP Twins (undefeated as well) Open Supersport-B (also 3rd in 600 s/s-B) 3rd Middleweight GP Twins (fastest SV650 at PIR!) Not too bad of a weekend huh?, Eric |
|
Feedback
Subject: ZX9 carb kit feedback Date: Sun, 5 Nov 2000 22:21:51 -0900 From: " Chris H" <chrs@ptialaska.net> To: <factory2@ix.netcom.com> Hi Marc, I'm just a backyard tuner, but this kit CRB-K88-1.7-RK for the '00 ZX9 rules!! Most of the magazines have been complaining about the abrupt throttle response, it cured it, but I was noticing other things too like long warm up times and the bike not starting immediately when hot. (very embarrassing) It cured these things, too! I have a Yoshimura pipe on the bike and until I can get too a dyno, probably next spring, I just installed it as per instructions but I couldn't find anything wrong after riding it most of the day. The installation was sort of easy but I was kind of paranoid about drilling the main air jets having never done that before but it was easy and I blasted carb cleaner all over to make sure the metal shavings were gone. Also I tried something that I remember you saying
once on the CBR list, I hope you weren't kidding cause then I'll feel
stupid, that either you or someone that you knew had tried "personal
lube" for putting the carb boots back on. I am on the ZX mail list and will definitely recommend your products to other listers. Thanks,
|
Links
Persistent missing at high rpm?
Anti-Theft Alarms?
Regardless of main jet selected? All air correction plumbing is properly connected?
- the bike still misses at full throttle / high rpm.
And you have an "alarm" installed???
Disconnect the alarm and retest.
As of October 24, 2001, there have been many reports of alarms causing high rpm
misfiring. Disconnect the alarm and the problem goes away.
It can be present when you install the alarm, may start after a crash or sometimes,
just "occur".
Call the alarm company to discuss that with them!
Cheers -
Marc


Series WMRC
| Absolutely NO carb parts sold in California. | ||
 |
New and improved Finally - Quick, easy, cost effective
Suzuki tuning
with no expensive "add-on boxes" |
|
|
Contact Factory
Pro 415 883-5620 no fax
Factory Pro If
it's |
parts
information EC997
dynamometer information Product
Support /Tech SECTION
And most importantly This Tuning Site has been visited by people. www.digits.net - the oldest counting service on the web |
Clock widget
|
LINKS |
|
|
|
Flight Training - train with AMA race winner Todd Harrington. The Harringtons own American Flyers, one of the most established flight training facilities in the USA - 8 locations - 800-362-0808 |
|
Train to Win |
The Rich Oliver
Mystery School will help you discover your hidden inner strength.
It will challenge you. It will teach you a new way of thinking and a new way of riding. You can take your riding to an exciting new level! We use a variety of proven drills and training techniques. Practicing these techniques with our Yamaha dirt track trainers will enhance your abilities both on the track or the street. It doesn't matter what you ride or race, the Rich Oliver Mystery School improves everyone's skill level and mindset! |
|
|
Book a sightseeing flight over the Wine Country
or a Kamikaze aerobatic flight or a biplane flight over famous
Sonoma Raceway,
the Golden Gate Bridge and the San Francisco Bay for one or two during
the spring and get a free souvenir t shirt! 707 938 2444 |
|
Make your next tour Unforgettable, Affordable and Exotic. Superbike Tours Thailand - See you there. Geoff@superbiketoursthailand.com |
|
| The extension of the laboratory
for engines of the Swiss Federal Institute of Technology was completed
in about 1935. Its architect was Rudolf Otto Salvisberg (1882-1940).
He had a successful career in Berlin but returned to Switzerland after
the advent of the Nazis. His architectural style was somewhat similar
to that of Erich Mendelsohn. The staircase of the laboratory is in normal
use but well preserved. Edited to the tunes of Chemical Residue by Herbie Hancock. |
|
 |
|
|
Artisan Crafted Fine Cheeses – Since 1865 - Specializing in Handmade Brie & Camembert |
|
| Marin French Cheese Co., also known as The Cheese Factory and Rouge et Noir is not just the oldest cheese manufacturer in the country, but a vacationers and day trippers destination as well as a unique part of American History. Located north of San Francisco, east of Napa County, west of Pt. Reyes and Olema and south of Sonoma County, Marin French has produced hand crafted Artisan soft ripened cheese since 1865. Rouge et Noir cheeses are similar to French and European varieties but reflect the characteristics of Northern California, producing it's own regional style. | |